The Query node is used to write custom SQL, SOQL, MDX, or DAX queries against a data source. The Query node can only be connected to data source nodes that represent SQL databases (SQL Server, MySQL, PostgreSQL, Oracle, and so on), a Salesforce database, MS OLAP, or MS Tabular sources. You can then inject an SQL, SOQL, MDX, or DAX statement into the node in order to return the required data set from the source.
Configure the Query node
Once the Query node is connected to the source node, it must be configured via the Properties panel. The script can be written or pasted directly in the Query window, or using the relevant Script Editor, or generated using an LLM. You can also produce a LLM-generated explanation of any script you've configured.
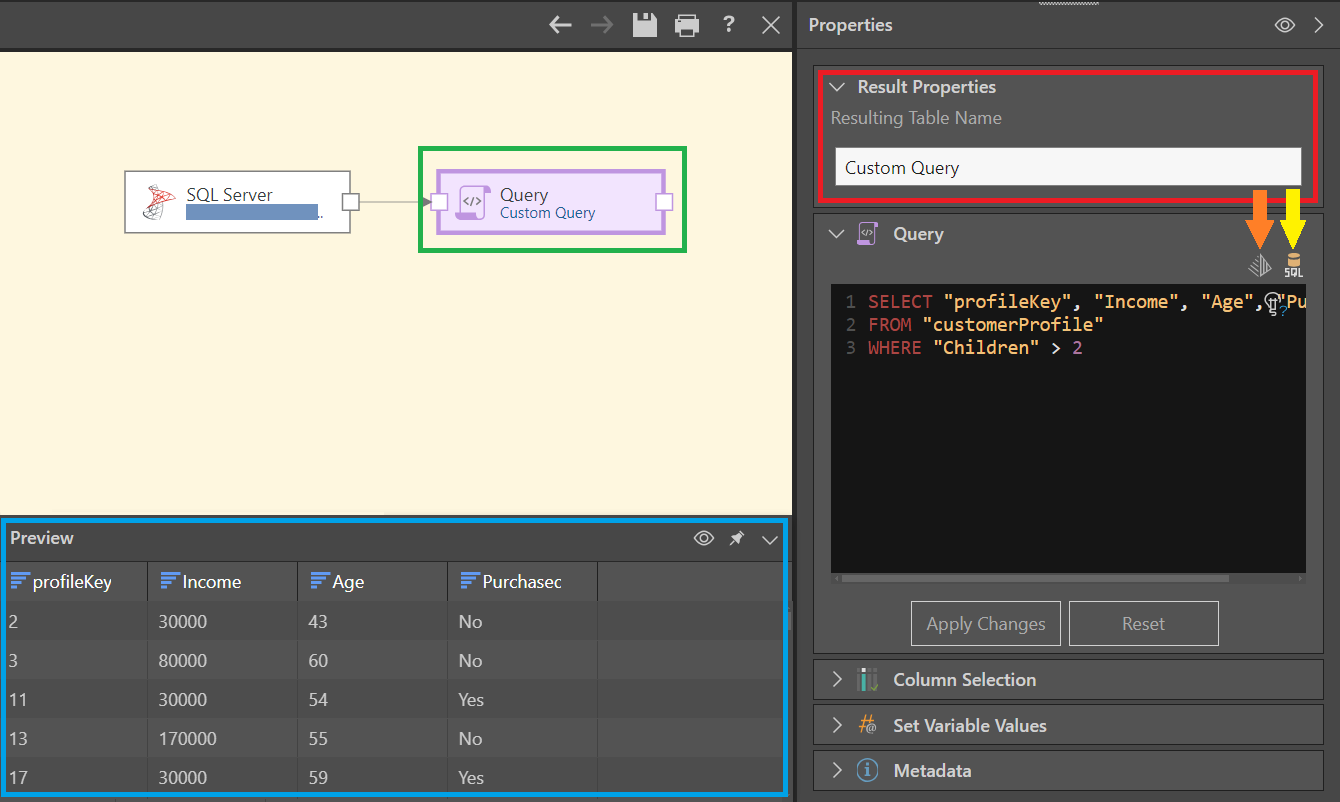
By default, the resulting table is called 'Custom Query' but this can be changed (red highlight). You can preview the resulting table from the Preview panel (blue highlight).
SQL Statements
Connect the Query node to the source node; enter your SQL script in the Query window.
- Click the SQL icon (yellow arrow) to open the SQL editor where you can easily access the data source's tables to write your script (see below).
- Click the Gen AI icon (orange arrow) to provide a prompt that with generate an SQL script (see below).
In this example, the following Select statement was used to return a the profileKey, Income, Age, and Purchased Bike columns from the customerProfile table, wherever the number of children was greater than 2:
SELECT "profileKey", "Income", "Age", "Purchased Bike" FROM "customerProfile" WHERE "Children" > 2
MDX and DAX Statements
MDX statements are supported for both MS OLAP and Tabular, and DAX statements are supported for MS Tabular. Connect the Query node to the MS OLAP or MS Tabular source node, then select the required data model from the Model Selection dropdown list in the Properties panel before writing or generating the script.
Generating Scripts
Use the AI integration to generate your SQL code. This is useful if you want to generate code quickly, or don't know the syntax, for example.
You can generate a script by clicking the Gen AI icon from the Properties panel and, in the Generate Your Script dialog, typing a “prompt” (description of your query) in natural language. Once you are ready, click Run. The AI uses its underlying LLM to generate a script based on your prompt. For more information, see Generate Your Script.
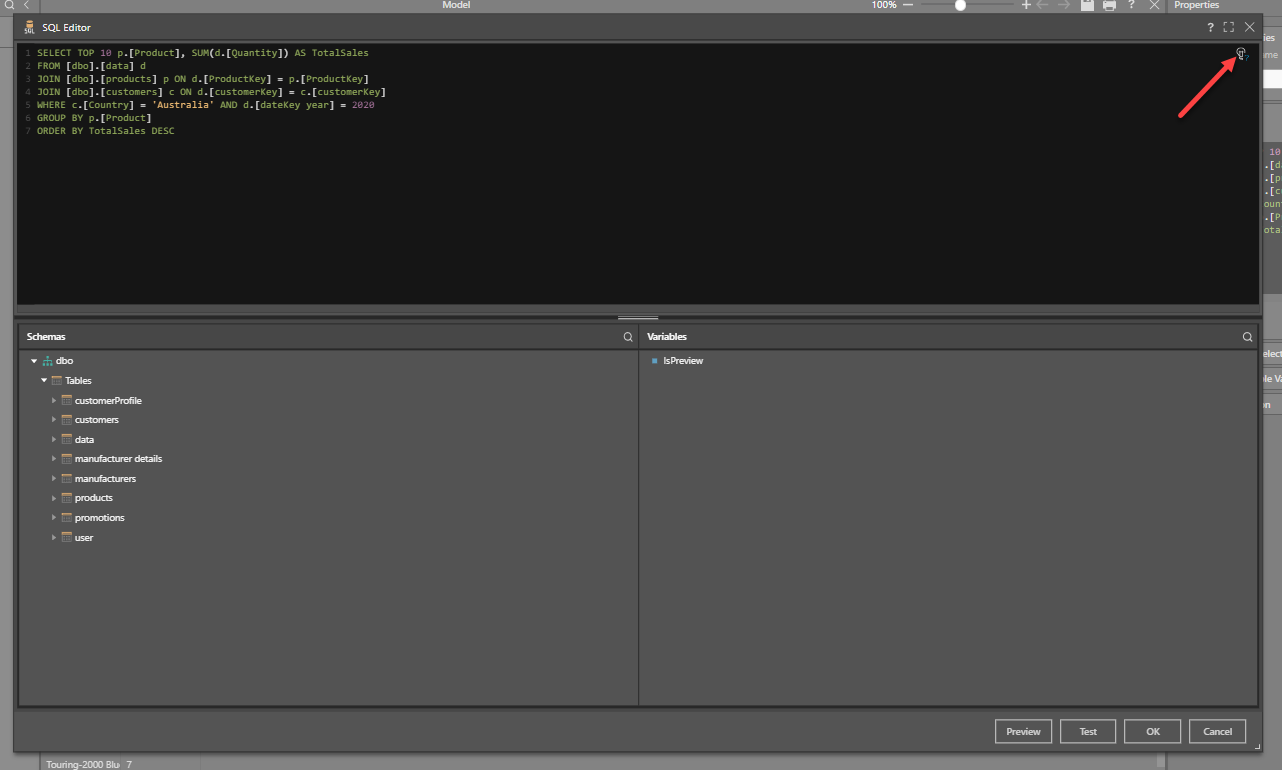
Script Editor
The Script Editor is an interface for writing PQL, MDX, SQL, and DAX scripts. It is available in a number of places throughout the application for advanced operations.
When configuring the Query node, the relevant script editor (SQL, MDX, or DAX) will be exposed depending on the given source.
Open the Script Editor from the Properties panel. This editor shows the data source's schemas; you can easily add tables and columns to the SQL, MDX, or DAX statement by double clicking or dragging and dropping. The editor also exposes any variables that have been configured in the Data Flow, enabling you to inject variables into the SQL statement.
Explain Script
![]() Use the Explain Script function to produce an AI-generated explanation of what the script does (note this is available even if the script was not itself AI-generated). Note: Each time you click the Explain Script button, a new explanation is generated. For more information, see Explain Script.
Use the Explain Script function to produce an AI-generated explanation of what the script does (note this is available even if the script was not itself AI-generated). Note: Each time you click the Explain Script button, a new explanation is generated. For more information, see Explain Script.
Preview Result Set
The result set of the SQL query can be previewed by clicking on the Query node, and then clicking the preview icon from the node's Properties panel, or from the Preview panel. By default, the preview is limited to the first 50 rows, but this can be changed from the Preview Size dropdown list in the ribbon.
- Click here to learn more about the Preview panel.
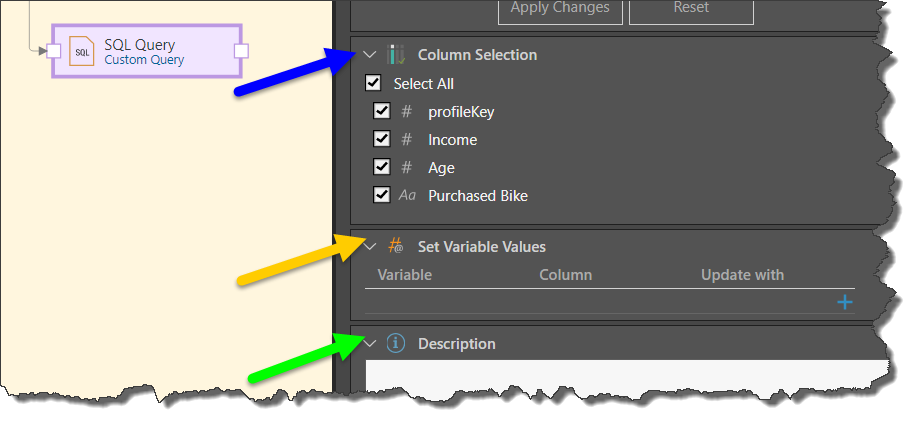
Column Selection
Expand the Column Selection panel to update the column selection for the given table. By default, all columns in the table are selected. You can, however, remove columns by clearing their checkboxes. Columns that are not selected will not be copied to the new data model.
Variables
Variables can be injected into the query node in 2 ways: directly into the SQL script, or using the Set Variable Values panel. In the first scenario, the variable is used to retrieve the required result set. In the second scenario, the variable can be used to drive another node or process, for instance in the Master Flow.
To pass variable values to the node, expand the Set Variable Values panel to pass a variable to the node. To do this, click the plus sign and then select the relevant variable, the aggregation type, and the relevant column.
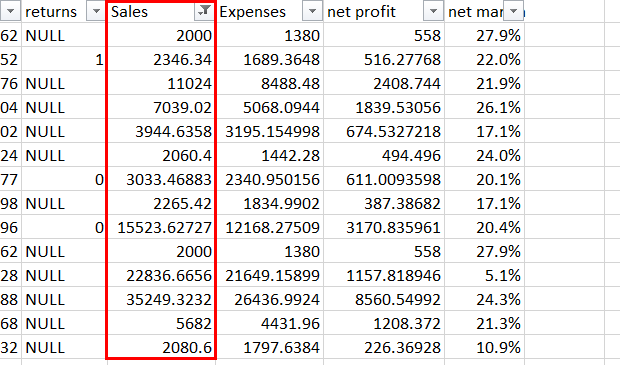
In this example, the Data table contains a Sales column:
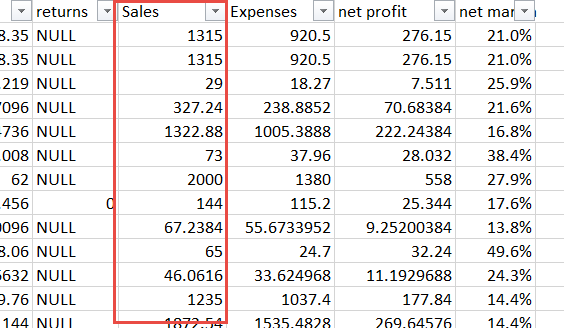
We only want to import rows where the sales were 2000 or more:
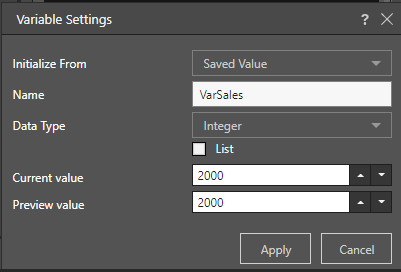
To do this, we create a variable with a value of 2000, names 'VarSales':
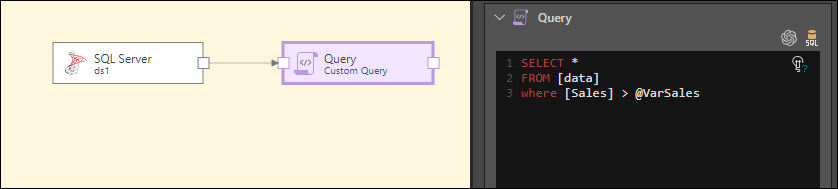
We then write a script that will return rows from the Data table only if the Sales value is higher than the variable:
SELECT * FROM [data] where [Sales] > @VarSales
Description
Expand the Description window to add your own description to the node's properties. This is useful for keeping track of the ETL process, especially if multiple users are working with the same ETL. For instance, you can copy the "Explain Code" description and paste it into the Description field,
Edit a Query Node
Edit the Query node from its Properties panel. You can change the table name, SQL statement, column selection, set incremental loading, and add a description.